Raw Pack Tomatoes: Mastering Peeling, Acidification, & Filling Jars for Home Canning
Embarking on the journey of home
canning tomatoes is a rewarding experience, transforming a bounty of fresh produce into pantry staples that capture summer's essence. The "raw pack" method, where uncooked tomatoes are placed directly into jars, is a popular choice for its simplicity and efficiency. This comprehensive guide will walk you through the crucial steps of preparing your jars, mastering the essential peeling process, ensuring vital acidification, and precisely filling your jars, setting you up for safe and delicious home-canned tomatoes. Whether you plan to finish with a boiling water bath or a pressure canner, the initial preparation for raw pack tomatoes remains consistent and critically important for both safety and quality.
Before diving into the specifics of preparing your glorious tomatoes, always ensure you are familiar with the operation of your chosen canner. Safety is paramount in home food preservation, and understanding your equipment is the first step. With your canner heating up and your clean jars ready, let's begin the hands-on work of turning fresh tomatoes into preserved goodness.
The Essential First Steps: Preparation & Peeling Tomatoes
The journey to perfectly canned tomatoes begins with meticulous preparation, and no step is more fundamental than peeling. This isn't just about aesthetics; it's a critical safety measure and a cornerstone of tested canning methods.
Why Peeling is Non-Negotiable
You might wonder, "Do I really need to peel tomatoes for canning?" The unequivocal answer is yes. All current, tested recipes and methods for
canning tomatoes safely, whether for pressure canning or water bath canning, rely on peeled tomatoes. Tomato peels can harbor bacteria and are notoriously difficult to clean thoroughly. Leaving them on introduces an unknown variable that can compromise the safety and shelf-stability of your canned goods. Furthermore, peels can become tough and unappetizing after processing, detracting from the texture of your finished product.
Mastering the Peel: A Step-by-Step Guide
1.
Prepare Your Workstation: Have a large pot of water boiling vigorously on one burner, and a large bowl of ice water ready on your counter. Ensure your jars are clean and ready, and your canner water is beginning to heat.
2.
Blanching for Easy Peeling: Using a metal strainer, slotted spoon, or blanching basket, carefully immerse a few tomatoes at a time into the boiling water. The goal is to loosen the skin, not to cook the tomato.
3.
Watch for the Split: Keep a close eye on the tomatoes. After approximately 30-60 seconds, you'll notice the skins beginning to split. Some tomatoes might take a little longer, but generally, a minute is the maximum. Over-blanching will cook the flesh, making them too soft.
4.
Immediate Ice Bath: As soon as the skins split, transfer the tomatoes directly from the boiling water to the bowl of ice water. This "shock" stops the cooking process and makes handling much easier.
5.
Slip Off Skins and Core: Once cooled enough to handle comfortably, remove each tomato from the ice bath. The skins should slip off effortlessly. If you encounter resistance, try another quick dip in boiling water for that specific tomato. While peeling, gently pull off the stem end and any firm, green core portion just beneath it. This "coring" ensures only the best parts of the tomato make it into your jar. For varieties like Roma tomatoes, which are wonderfully meaty and have fewer seeds, this process is often even simpler.
As you peel, you can immediately slice larger tomatoes into halves or quarters to fit your jars. Smaller, firmer varieties like Romas can often be left whole. Have your clean jars at the ready to receive the peeled, cored tomatoes directly.
Acidification: Your Non-Negotiable Safety Net for Canning Tomatoes
After peeling, the next critical step in safely preserving
home canned tomatoes is acidification. This step is absolutely essential, regardless of whether you're using a boiling water bath or a pressure canner, and it's a fundamental requirement for all modern tomato canning recipes.
Understanding Why Acidification is Crucial
Tomatoes are naturally borderline acidic. While many varieties have a pH low enough to be safely canned in a boiling water bath, some modern varieties, or those grown in certain conditions (like drought or over-ripeness), can have a pH that fluctuates into the "low acid" range (above 4.6 pH). In low-acid environments, the deadly *Clostridium botulinum* bacteria can thrive and produce toxins. Adding an acid like bottled lemon juice ensures that the pH level of your tomatoes drops below 4.6, creating an acidic environment where botulism spores cannot grow, thus making your canned tomatoes safe for consumption. Do not skip this step under any circumstances.
How to Acidify Your Jars
The most commonly recommended and safest method for acidification, with clearly established dosages, is using
bottled lemon juice. It's crucial to use *bottled* lemon juice (not fresh) because its acidity level is standardized and consistent. The acidity of fresh lemons can vary significantly, making it unreliable for canning safety.
*
For Quart Jars: Add 2 tablespoons of bottled lemon juice to each quart jar.
*
For Pint Jars: Add 1 tablespoon of bottled lemon juice to each pint jar.
You can add the lemon juice before you begin filling the jars with tomatoes. This is often easier and ensures it's not forgotten. If you do forget, simply add it on top of the packed tomatoes, removing a spoonful of tomatoes if necessary to prevent overfilling.
The Role of Salt: Optional, but Recommended
Salt is an optional addition to your canned tomatoes and serves purely as a flavor enhancer. It does not contribute to the safety of the canning process. However, many find that a touch of salt significantly improves the taste of the finished product.
*
For Quart Jars: Add 1 teaspoon of canning salt to each quart jar.
*
For Pint Jars: Add 1/2 teaspoon of canning salt to each pint jar.
If you are monitoring your sodium intake or prefer to season your tomatoes later, you can reduce or entirely eliminate the salt without any impact on safety. Just like the lemon juice, adding salt before filling the jars is often more convenient.
Mastering the Raw Pack: Filling Jars with Precision
With your tomatoes peeled, cored, and your jars prepared with the necessary acidification, it's time to fill them using the raw pack method. This technique involves packing raw, uncooked tomatoes directly into the jars, allowing their natural juices to fill the spaces.
The Raw Pack Technique
1.
Pack Tightly: As you peel and core your tomatoes, immediately place them into your prepared jars. For larger tomatoes, cut them into halves or quarters to fit snugly. Smaller varieties like Roma tomatoes can be left whole. Pack the tomatoes as tightly as possible without causing excessive damage.
2.
No Added Water: A hallmark of the raw pack method is that *no water is added* to the jars. The tomatoes will release their own juices during the packing process and subsequent processing, which will fill the voids.
3.
Press Down to Release Juices: As you add tomatoes, use a clean utensil (like a jar packer or the back of a spoon) to gently press down on them. This action helps to release their natural juices and encourages the tomatoes to settle, minimizing air pockets. You're not aiming to mash them, but to gently compress them until the spaces between the tomato pieces begin to fill with their own liquid.
4.
Maintain Headspace: Headspace is the empty space between the food level and the rim of the jar. For raw packed tomatoes, you need to leave a consistent
1/2-inch headspace. This space is crucial to allow for expansion during processing and to ensure a proper seal.
5.
Remove Air Bubbles: Once the jars are filled to the correct headspace, it's vital to remove any trapped air bubbles. Use a plastic or rubber spatula, a non-metallic knife, or even a specialized canning tool designed for this purpose. Gently slide the tool down the inside of the jar, pressing against the tomatoes to release air pockets. Re-check the headspace after this step, adding more tomatoes and juice if needed to maintain the 1/2-inch space. Trapped air can lead to discoloration and compromise the vacuum seal.
6.
Wipe Jar Rims: Before placing the lids, use a clean, damp cloth to thoroughly wipe the rims of each jar. Any food particles or residue on the rim can prevent the lid from sealing properly.
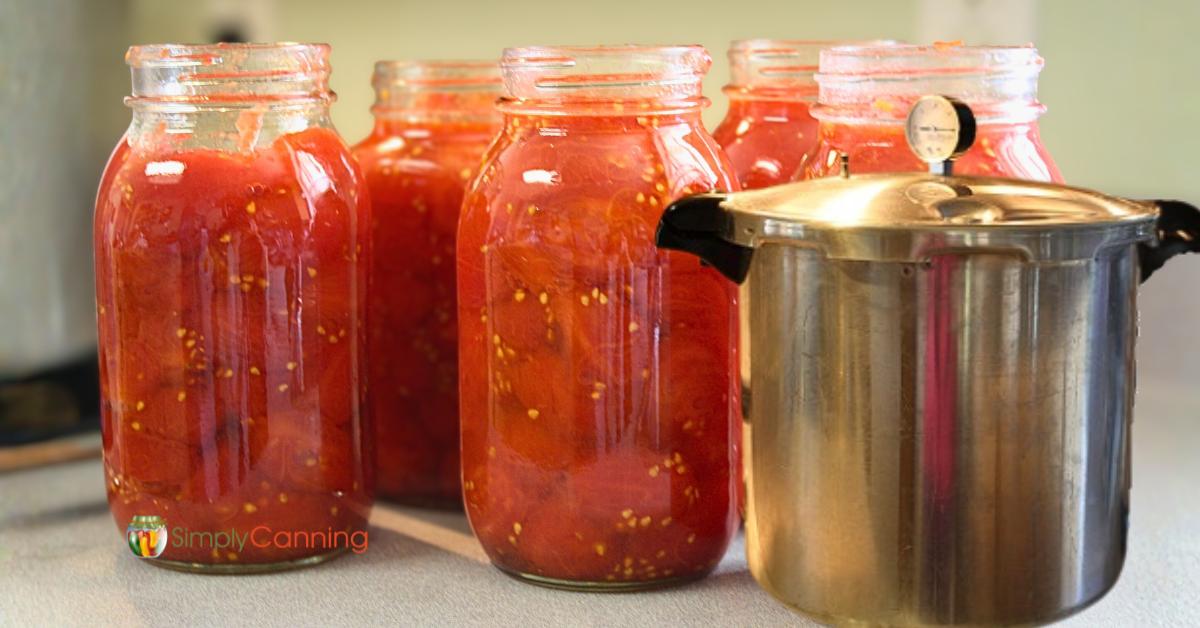
Processing Your Raw Pack Tomatoes
Once your jars are meticulously filled, acidified, and sealed, they are ready for processing. This final stage is where the magic of preservation truly happens, ensuring your
raw pack canning tomatoes are safe for long-term storage. As mentioned earlier, while the preparation steps for raw pack tomatoes are identical, the processing method and times will differ based on whether you choose to use a boiling water bath or a pressure canner.
For detailed instructions on processing times and specific procedures for both methods, which are crucial for achieving a safe and stable product, you'll want to consult reliable canning resources.
Conclusion
Mastering the art of raw pack canning tomatoes is a deeply satisfying skill that empowers you to enjoy the fresh taste of summer year-round. By diligently following the essential steps of preparing your jars, precisely peeling your tomatoes, meticulously adding the required acidification, and carefully filling your jars to the correct headspace, you lay the foundation for a safe and successful canning experience. Remember, each step, especially peeling and acidification, plays a critical role in ensuring the safety and quality of your preserved goods. With a little practice and attention to detail, you'll soon be enjoying the unparalleled flavor of your own home-canned tomatoes, a testament to your culinary prowess and dedication to food preservation.